Chapter 1: Basic Operations & Clone Management
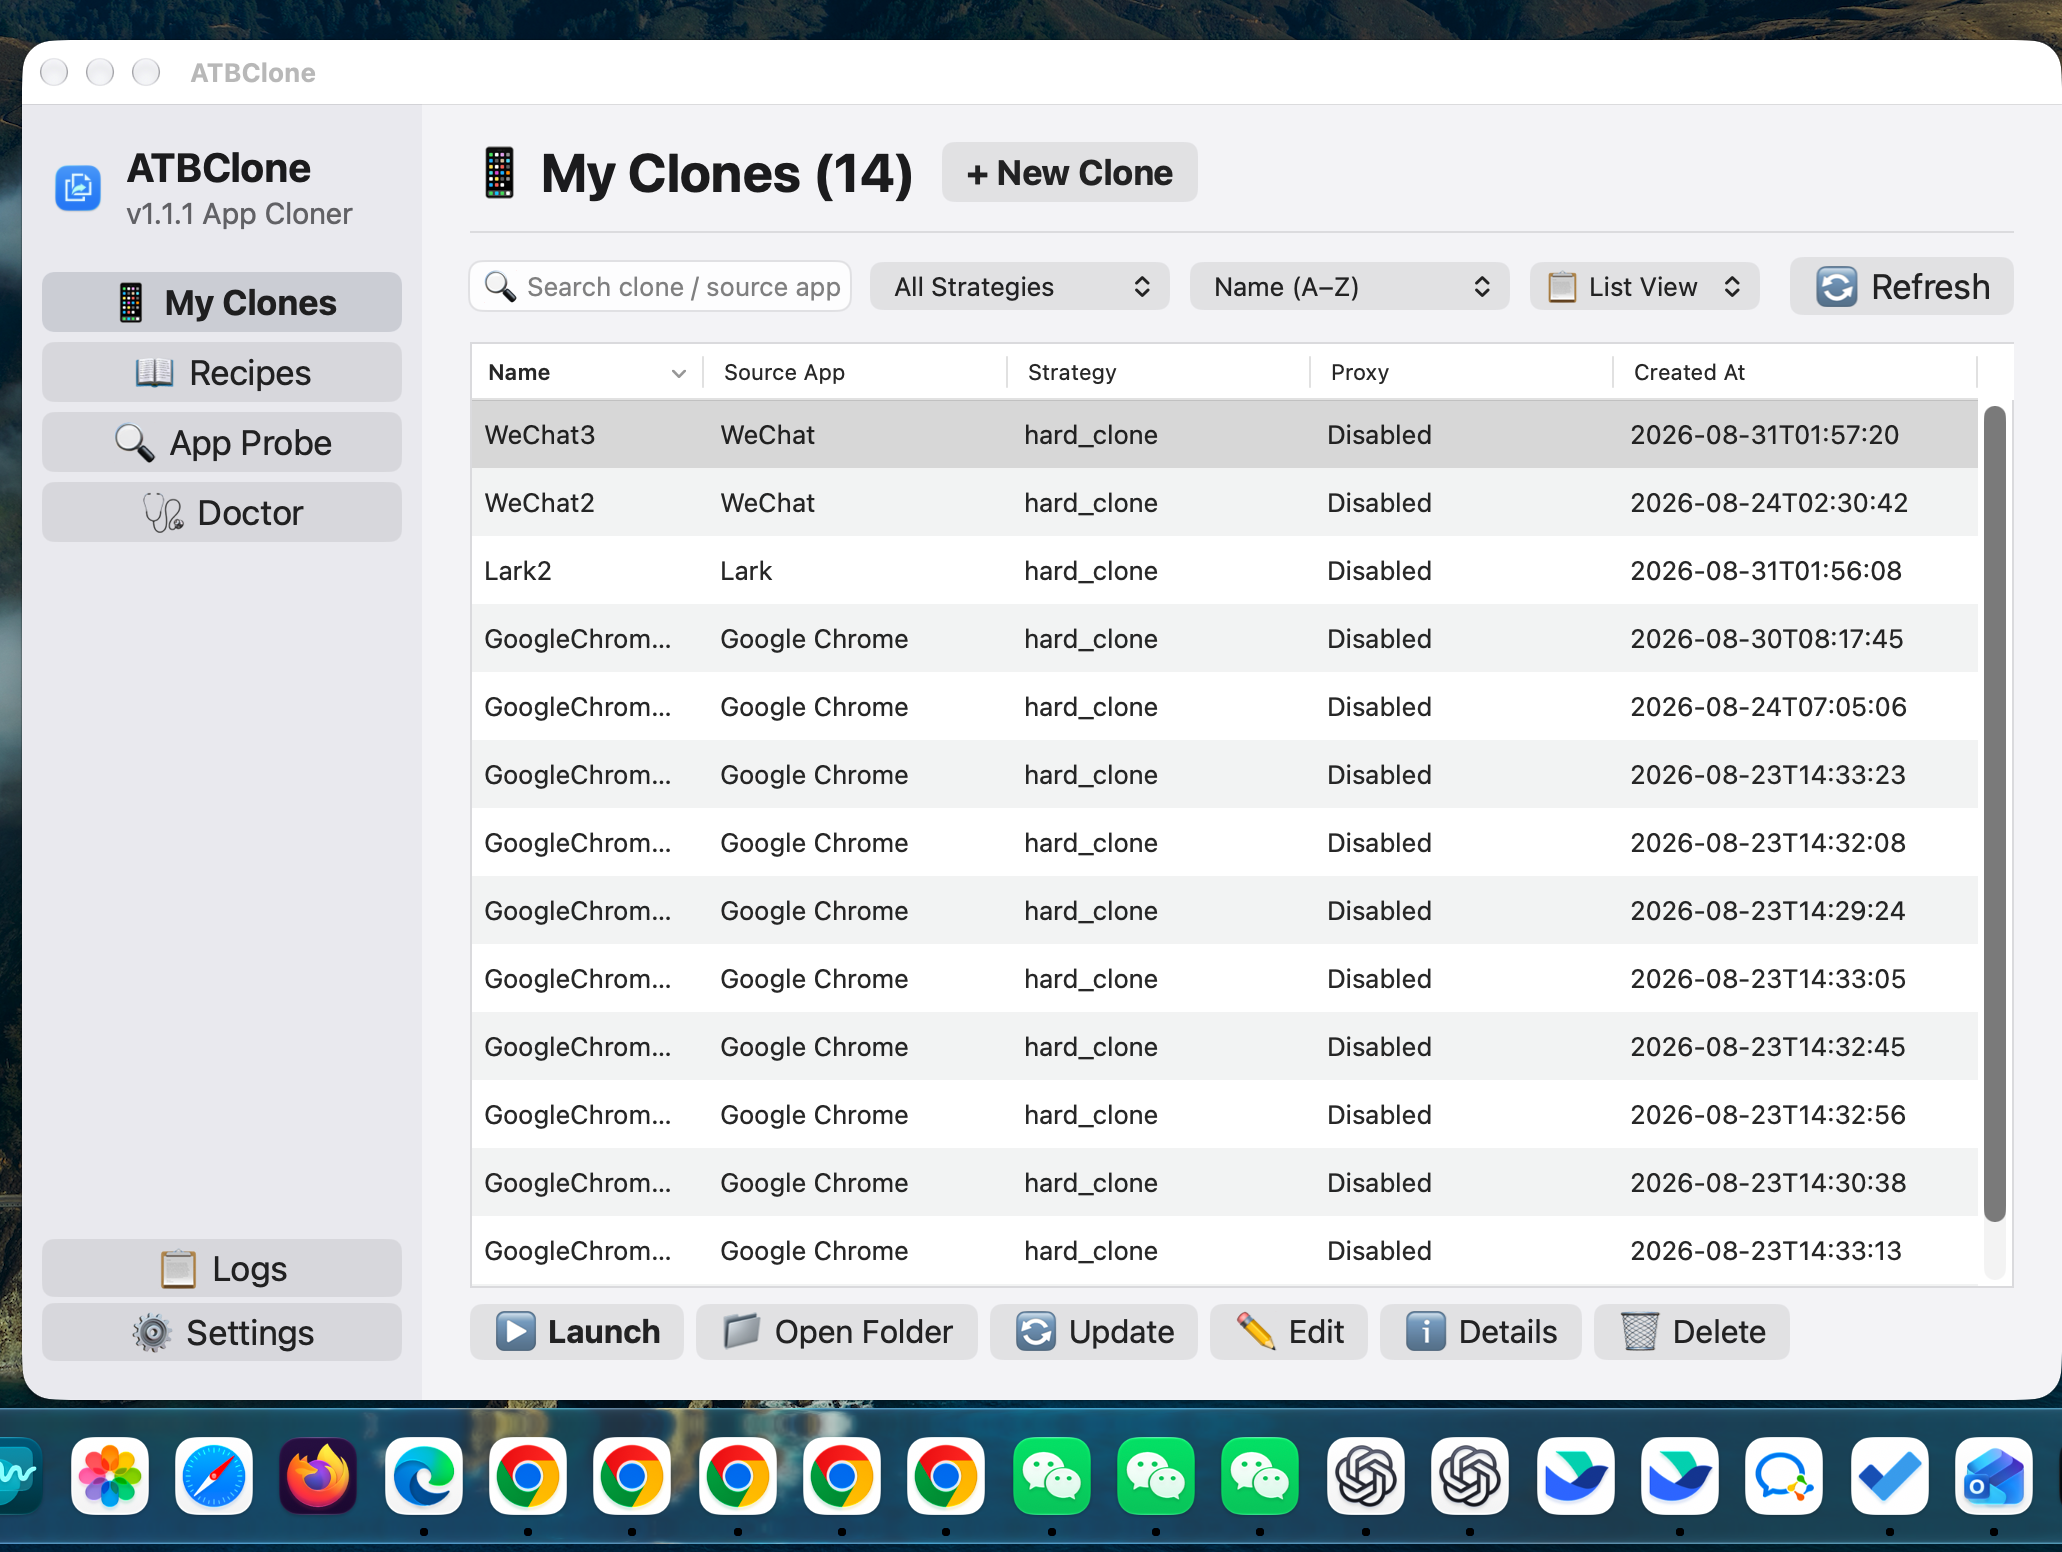
This chapter guides you step-by-step through creating your first isolated application clone using the 7-step wizard, followed by routine management techniques including instant launch, one-click data directory access, non-destructive updates when host apps update, batch table operations, and safe deletion.
📑 Table of Contents
- Creating a Cloned Application (7-Step Wizard)
- Step 1: Select Primary Application
- Step 2: Inspect Recipe & Strategy
- Step 3: Clone Identity & UI Language
- Step 4: Installation Destination
- Step 5: Dedicated Data Directory
- Step 6: Network Proxy Configuration (Optional)
- Step 7: Confirmation & Execution
- Managing Cloned Applications
- Launching Cloned Applications
- Directly Opening the Data Directory
- Editing Clone Configuration
- Updating Clones After Primary App Upgrades
- Batch Operations (Batch Update & Batch Delete)
- Safe Deletion (Keeping vs. Purging Data)
🪄 Creating a Cloned Application (7-Step Wizard)
Click the "+ New Clone" button in the top right corner of the ATBClone dashboard to launch the interactive wizard.
+-------------------------------------------------------------+
|  🧙 Create New Clone - Step 1 of 7                          |
|                                                             |
|  Select Target Application (.app)                           |
|  [/Applications/WeChat.app                   ] [ Browse... ]|
|                                                             |
|  [ Cancel ]                                 [ Next Step > ] |
+-------------------------------------------------------------+
Step 1: Select Primary Application
- Click "Browse..." to open the native macOS file picker (defaults to
/Applications). - Select the target application bundle (e.g.,
WeChat.app,Telegram.app,Google Chrome.app, orCursor.app). - Click "Next Step >".
Tip
You can also manually paste the full path of any .app located anywhere on your disk (including external drives).
Step 2: Inspect Recipe & Strategy
ATBClone automatically inspects the chosen application:
- Built-in Match: If the app matches one of our 33+ built-in recipes, ATBClone automatically selects the optimal strategy (e.g.,
Hard Clonefor WeChat,Soft Clonefor Cursor/VS Code). - Smart Prober: If the app is not in the built-in library, the engine dynamically scans its Mach-O binary and sandbox entitlements, determining the best strategy automatically.
- Strategy Selection: You can manually toggle between:
hard_clone: Duplicates the bundle, mutates bundle ID, and injects environment isolation mechanisms.soft_clone: Lightweight launcher shell passing isolated parameters.- Injection Mode (Injection Strategy): For Hard Clones, you can configure the underlying injection technology:
auto(Default & Recommended): Automatically probes Mach-O header padding headroom. For native applications with sufficient headroom, it uses In-Process Dylib Injection (dylib) (zeroexecvprocess substitution, guaranteeing full Notification Center and Menu Bar status item support). If padding is insufficient or custom CLI args are required, it gracefully falls back to Launcher Packaging (launcher).dylib(Dynamic Library Injection): Forces in-process dylib injection via Mach-OLC_LOAD_DYLIB. If the binary header lacks space, it reports an error rather than corrupting the binary. Ideal for native messengers (WeChat, Telegram).launcher(Launcher Packaging): Forces the traditional native Mach-O C launcher wrapper with.binbinary backup.
Click "Next Step >" to proceed.
Step 3: Clone Identity & UI Language
Customize how your clone appears on your system:
Clone Name:    [ WeChat2                         ]  (Used for folder naming & internal ID)
Display Name:  [ WeChat Work                     ]  (Visible in Dock, Spotlight & Finder)
UI Language:   [ English (en)                  v ]  (Independent interface locale)
- Clone Name: Alphanumeric identifier (e.g.,
WeChat2,Telegram-Work). - Display Name: The friendly title shown in the macOS Dock, Spotlight search, and Finder window titles. By default, it syncs with the Clone Name until you customize it.
- UI Language: Set an independent language locale for this clone (e.g., keep your primary app in Chinese, but run the clone in English or Japanese).
Click "Next Step >".
Step 4: Installation Destination
Choose where the newly created cloned .app bundle will reside:
- Default (
~/ATBClone/Apps— Recommended): Installs directly into your user ATBClone applications folder. Requires zero administrator passwords or root elevation. - System (
/Applications): Installs alongside standard system apps. ATBClone will request standard macOS authorization once via native dialog.
Click "Next Step >".
Step 5: Dedicated Data Directory
Configure where the clone will store its isolated databases, chat logs, cache, and preferences:
- Default (
~/ATBClone/Data/<CloneName>): Automatically creates an isolated data sandbox. - Custom Path / External SSD: Click "Browse..." to select an external storage drive, secondary volume, or custom encrypted container.
Note
For applications that do not support dynamic data redirection (such as certain fixed-path command tools), the wizard will display a notice that the data directory is managed by the system.
Click "Next Step >".
Step 6: Network Proxy Configuration (Optional)
If you want this specific clone to route its network traffic through a dedicated proxy (e.g., to separate work and personal network environments or prevent IP association):
- Toggle the "Enable Dedicated Proxy" switch.
- Choose protocol:
HTTP,HTTPS, orSOCKS5. - Enter your local proxy host (default:
127.0.0.1) and port (e.g.,7890or1080).
Click "Next Step >".
Step 7: Confirmation & Execution
Review the summary configuration card:
- Source Application:
/Applications/WeChat.app - Clone Name:
WeChat2 - Strategy:
hard_clone - Destination:
~/ATBClone/Apps/WeChat2.app - Data Storage:
~/ATBClone/Data/WeChat2 - Proxy:
http://127.0.0.1:7890
Click "Clone Now 🚀". The progress bar will track physical copying, Plist mutation, sandbox stripping, wrapper injection, and ad-hoc code re-signing. Once complete, your new clone is ready for use!
🎛️ Managing Cloned Applications
ATBClone offers two visual modes for browsing your clones: Card Grid View (rich visual cards) and Table View (compact list with multi-selection support).
graph LR
    Dashboard[ATBClone Dashboard] --> CardView[Card Grid View]
    Dashboard --> TableView[Table View]
    CardView --> SingleOps[Single Actions: Launch, Open Dir, Update, Edit, Details, Delete]
    TableView --> BatchOps[Batch Actions: Multi-Select, Batch Update, Batch Delete]
Launching Cloned Applications
- From ATBClone: Click the prominent "Launch" button on the application card or table row.
- From macOS Spotlight: Press
Cmd + Space, type your clone's Display Name (e.g.WeChat Work), and pressEnter. - From Dock / Finder: Double-click
~/ATBClone/Apps/WeChat2.appdirectly.
Directly Opening the Data Directory
Need to inspect downloaded files, clean up storage, or copy offline files?
- Click "Open Dir" on the clone card or action bar.
- Finder will instantly open the dedicated storage folder (
~/ATBClone/Data/<CloneName>).
Editing Clone Configuration
Need to rename your clone, change its UI language, or adjust its proxy server?
- Click "Edit" on the clone card or table toolbar.
- In the Edit Clone window, adjust:
- Display Name: Update how the app is labeled in the Dock and Finder.
- Language Locale: Switch language between English, 简体中文, 日本語, etc.
- Proxy Settings: Enable, disable, or modify proxy host/port.
- Click "Save Changes". Changes take effect on the next application launch.
Updating Clones After Primary App Upgrades
When your primary application (e.g., WeChat or Chrome) is upgraded through the Mac App Store or auto-updater:
- Open ATBClone.
- Select your clone and click "Update".
- ATBClone will seamlessly re-clone the latest binary code from the updated primary application while preserving 100% of your user data, login sessions, and chat histories.
Important
Zero Data Loss Guarantee: Because ATBClone strictly isolates application executable binaries from your user data directory, re-cloning or updating never touches your local database or chat history.
Batch Operations (Batch Update & Batch Delete)
When managing multiple cloned applications:
- Switch to Table View via the top toolbar view mode toggle.
- Use standard macOS multi-selection:
Cmd + Click: Select multiple non-contiguous rows.Shift + Click: Select a contiguous range of rows.- The bottom action bar will adapt dynamically:
- "Update (N Clones)": Upgrades all selected clones sequentially.
- "Delete (N Clones)": Deletes all selected clones in a single operation.
Safe Deletion (Keeping vs. Purging Data)
When clicking "Delete" (or during batch deletion), ATBClone provides a safe two-tier confirmation dialog:
+-------------------------------------------------------------+
|  ⚠️ Delete Cloned Application                                |
|                                                             |
|  Are you sure you want to remove 'WeChat2'?                 |
|                                                             |
|  [X] Also permanently delete data directory (~/ATBClone/...) |
|                                                             |
|  [ Cancel ]                         [ Confirm Delete ]      |
+-------------------------------------------------------------+
- Keep Data (Unchecked - Default): Removes the
.appbundle from~/ATBClone/Appswhile preserving your chats, preferences, and databases in~/ATBClone/Data/WeChat2. You can recreate the clone later and immediately resume where you left off. - Purge Data (Checked): Permanently removes both the
.appbundle and the entire data storage directory.
⏭️ Next Steps
- To learn how to clone unlisted or niche applications and understand recipe parameters, continue to Chapter 2: Custom Recipes for Niche Apps.
- For under-the-hood engine mechanics, proceed to Chapter 3: Under the Hood & Advanced Parameters.
- For FAQs and issue reporting, visit Chapter 4: FAQ & Diagnostic Troubleshooting.